Sunday, August 5, 2012
JerseyFest 2012
I'm not posting about it here, just a link to my other blog with a brief report on the show and a picture gallery. When you see what the picture gallery looks like in a post on blog.com you will see why I'm not posting it on Blogger. Here's the link: http://bellerophon.blog.com/2012/08/05/jerseyfest-2012/

Monday, July 30, 2012
Tetryon Parts Upgrade for Enterprise-D
 If you followed the discussion on SSM forum about this, you know this has been a long time in the works. Pat Suwalski of Tetryon Parts shared his progress as he worked to accurize the back side of the neck (aka battlehead) of the AMT 1:1400 Enterprise D, now re-released in clear styrene. He pointed out what was wrong with it and showed how he was fixing it to match the real thing--the large filming miniature. One problem was that the impulse engine was in the wrong place. However, this is not just about his correcting other people's mistakes, something everyone wants to do, but correcting his own, which few people want to do.
 |
| Old upgrade part test-fit. |
Finally, June 29 he offered the piece for sale. I ordered one immediately, in clear resin with matching decals (it's available in opaque resin as well, and decals are optional). I've got the clear kit, and plan to use the kit's aztec decals. The kit decals (art by Jim Small of EIMB) are made to fit the kit, so if you correct an inaccuracy, you'll need a corrected decal as well!
It arrived in the mail July 17. I got out the 1701D kit and assembled the sides of the neck (parts 5 & 6) to test fit the replacement part. (Note: the part replaces the back of part 3, which is the back of the neck and top of the battle head, or the mating surface to the saucer section.) Pat had been candid in his posts on SSM forum (here's the thread) about the fact that his part was thin and might warp. Well, it did. Mostly I think the part was squashed flat in the mail, since it was shipped in a padded envelope. The part has a boxlike structure on the inside of the impulse engine, and that was crushed, though it could be rebuilt easily with sheet styrene. The worst problem, though it was the most subtle, was a wavy distortion of the area where the neck blends to match the curve of the saucer, most pronounced above shuttlebay 2. I wasn't sure I could fix that as easily.
 |
| Old (top) and improved upgrade parts. |
 |
| New upgrade part test-fit. |
 |
| New upgrade part test-fit. |
And I can definitely recommend Tetryon Parts after this experience.
PS: July 31, 2012. Now my part is perfect!
I dipped the part in boiling hot water for a minute, draped it over the other neck parts holding it in place with my fingers, then dipped the whole assembly into icewater. The clear resin is floppy like a sheet of rubber at 212 F. I'd recommend not getting the water that hot--maybe just the temperature of hot bathwater.
The flattening of the part wasn't too bad in the first place--it would have stayed in place with CA or epoxy--I just wanted to assemble it without putting any stress on it.
Saturday, July 28, 2012
One Day Build: Star Blazers Mini No. 10--Finished on Time!


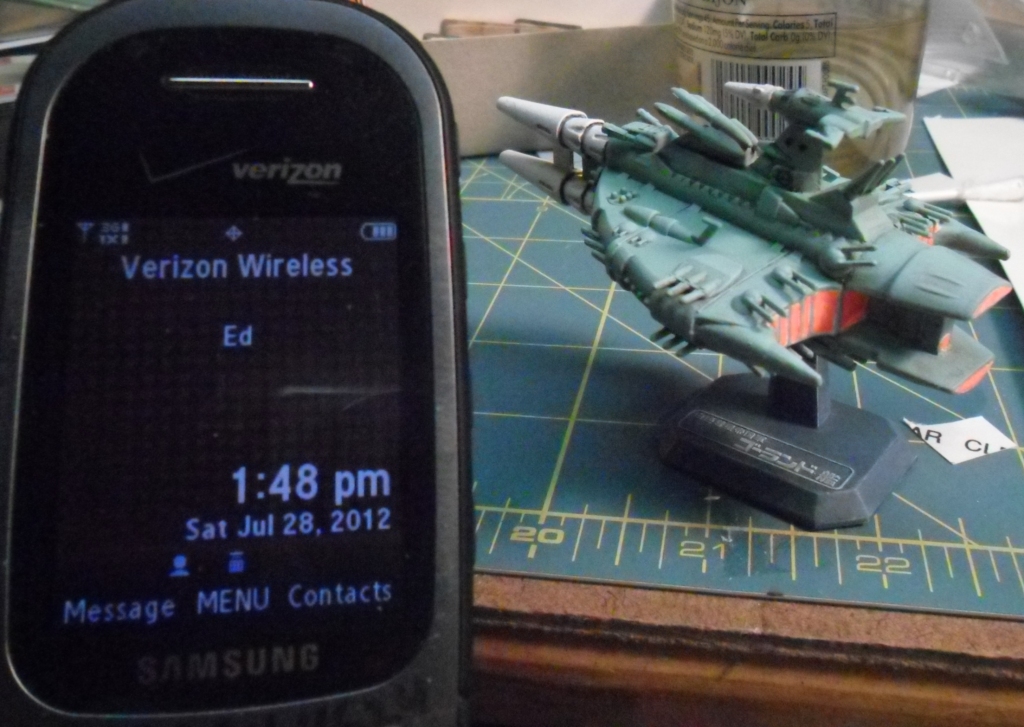

One Day Build: Star Blazers Mini No. 10

Anyway, it was a bust from the one-day standpoint, but the model came out looking okay. Eventually.
 Here's the victim for my current attempt: Bandai Star Blazers Mini No. 10, a Comet Empire missile ship. This sucker is just bristling with weaponry. I guess the Comet Empire is into massive overkill.
This time I've got it planned better and I only need to be done by 1:49 PM Eastern Daylight Time, Saturday, July 28, 2011, or in about 13 hours. And I've already got it completely assembled, primered with Tamiya grey sanding primer, puttied, sanded, puttied, sanded, etc.There was some flash, which surprised me--I don't recall ever seeing any flash on a Bandai kit, even ones this old.
I'm keeping modifications to a bare minimum. I hollowed out a couple of what appear to be gun barrels (2 parts no. 12), using a carbide bit in my Dremel tool, and scraped the guns on the 12 parts no. 6 (double-mount gun turrets) with an x-acto knife to give the gun barrels a more cylindrical shape, where they had been flat-bottomed. Using AutoCAD, I designed decals for those compound eye scanner things on the front of the ship and printed them out on my Alps printer, and they came out looking good on the first try. Yay!
Tomorrow, I'll paint this ship, add the decals, weather it a bit, and write another post.
Saturday, July 21, 2012
Tiny Enterprise Bridge Finished, or PGMS Cutaway Starship Photoetch Set, Part 7
 |
| Superdetailed bridge from AMT Cutaway Enterprise with coins for size reference. Yes, it's small. |

 Finished, as in I've had enough frustration and I've got other modeling projects I am impatient to get back to. That sounds disgruntled, but actually this was a pretty good learning experience. It was an impulsive mistake to paint the figures before bending them, and some of the paint came off. I had a little trouble bending the figures into the desired poses. In particular, the bend at the hips for a seated figure tended to come out too low. As a result, I have a better idea of how to get the bend to come out where I want it. Holding the figures with tweezers and dipping their feet in superglue worked pretty well, but I needed to be more patient about placing them. Amazingly, none of the ten figures were eaten by the carpet monster!
Friday, July 20, 2012
Eentsy Weentsy People for the Enterprise Bridge , or PGMS Cutaway Starship Photo-etch Set, Part 6
Finally, I've gotten back to the tiny Enterprise bridge I was detailing with parts from the PGMS Cutaway Starship photo-etch set. Last time, I'd painted it. I've been painting it some more, for the most part clumsily attempting to fix my sloppy work.
Soon, it'll be time to populate the bridge. I've been painting some Gold Medal Models 1/700 photoetch sailors in Starfleet uniforms, and they'll be about the perfect size. I painted them on the fret, since it'll be impossible to paint them after they're removed. Some of the figures will need to be bent, as well, since i intend for Kirk, Sulu, Chekov, and Uhura to be seated. I made sure to take photos of the painted figures before removing them from the fret--I'll take every precaution, but the carpet monster is voracious!

Soon, it'll be time to populate the bridge. I've been painting some Gold Medal Models 1/700 photoetch sailors in Starfleet uniforms, and they'll be about the perfect size. I painted them on the fret, since it'll be impossible to paint them after they're removed. Some of the figures will need to be bent, as well, since i intend for Kirk, Sulu, Chekov, and Uhura to be seated. I made sure to take photos of the painted figures before removing them from the fret--I'll take every precaution, but the carpet monster is voracious!

Sunday, July 8, 2012
One Day Build: Star Blazers Mini No. 8--Finished in Eight Days
This isn't how Scotty would recommend getting a reputation as a miracle worker. Originally to be done in 24 hours (see previous post), this kit is finally done a week past the deadline. It's probably nicer than it would have been. I worked on it almost every day for an hour or two, and had time to think about what I wanted to do. Once the deadline was blown, I decided to replace the flight deck sticker with a homemade decal. As it turns out, this didn't take long at all. I scanned the sticker and imported the raster image into AutoCAD and traced a vector image over it, which I printed out on my Alps printer on decal paper. Here's a picture of the decal (right) next to the sticker.
 I wrecked the decal putting it on and printed another, no problem. I didn't use any setting solution, just painted the flight deck with Future before decaling and PollyScale clear flat afterwards. The decal also needed a tiny bit of touchup with black paint before the dull coat. Here's the result, on the left. The Comet Empire twin-deck carrier at right is one I built in the '90s, shown for comparison.


Subscribe to:
Posts (Atom)